Mughal Miniature Techniques - Making Wasli Paper
written by Hugh McDonald
- wheat flour
- water
- a piece of wooden board to work on
- another heavy piece of wood board to lay on top the Wasli to keep it flat.
- gum tape. This can be the tape used by butchers, or purchased in an art store. It has gum on one side, and must be wetted in order to adhere.
- the paper. We used some blank newsprint paper. We used extra
- A polished stone. This is used to rub the paper when it is dry, until it is extremely polished and smooth. In Pakistan, the artists use a special large stone. Nisar found a polished piece of marble the shape and size of an egg for this purpose, but would prefer a large piece of stone. Other artists experimenting with this technique have used large heavy glass bottles, though these are not as good.
- a natural sponge for mopping up excess glue.
To make the paste, mix two heaping tablespoons
of flour with half a cup of water and mix thoroughly. It is best to let
it sit in the refrigerator for a couple of hours so lumps are
dissolved. Boil 2 cups of water, and slowly mix this paste in the water
and remove from heat. Strain the paste to remove any lumps. As soon as
the paste is cool enough to touch you are ready. One recipe for wheat
paste suggests adding a tiny amount of alum (a common preservative)
which acts as a preservative and also may make the paste more
waterproof when dry, but in this case Nisar did not do this.
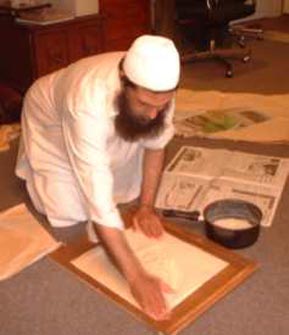
Lay the first sheet of paper flat on your board, spread the wheat paste generously on top, and spread it around with the palms of your hands into the paper. Work from the middle to move bubbles out from under the paper so they will escape from the side.
Then take your second piece of paper, spread wheat paste on one side, then lay the side with the paste down on the first piece of paper. Wash the paste from your hands, and then rub the paper with your palms. Work the bubbles out from the middle. If you ever put wallpaper on a wall, you know how to do this. Repeat the process with more pieces of paper. You can make it 4 pieces of paper thick, or more.
When you have placed the last piece of paper, it will not have paste on the top side. As you rub it, the paste will soak through the paper. Use a moist sponge to dab the paper and pick up the paste. Then wet the paper and rub it some more, always working from the center. Paper stretches when wet, and shrinks as it dries, so the top piece of paper must be as wet as the others or else they will warp when drying.
A TIP. When you are working with this last piece of paper, you can use a pin and poke just a few holes here and there. This will allow bubbles to escape.
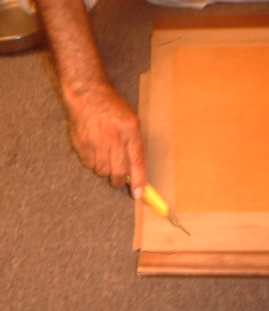
A TIP. Use a sharp knife to cut a line at the corners of the tape. When the paper shrinks this will prevent the paper from ripping in two or buckling. This is also useful in stretching and drying water-colour paper.
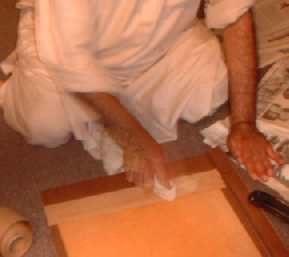
Next, you lay a clean sheet of paper on top of the wasli to blot up excess moisture. Then you can lay more paper (this time, ordinary newspaper will do) on top of this, and place your second board on top to press it down. It will probably dry within three days, but this may be shorter or longer depending on temperature and humidity. We have not completely experimented with the idea of using an iron to accelerate this process, but it may work.
Finally, when the paper is dry, use your polishing stone (or whatever you have) and rub the paper until it is very smooth and shiny. What you will have is an extremely smooth paper that can accept the tiniest brush strokes and details, and which will not warp when you use water-based paints. You can cut the paper into smaller pieces if you want to paint miniatures. Artists commonly stain wasli paper with tea.
Next you draw your design on the paper. Sometimes you may transfer a drawing using carbon or graphite transfer paper, or you may draw free hand. Then ink in your drawing. In Pakistan, artist often use a special ink stick which they can dip in water and sharpen. In North America, pens and brushes are more likely. Outline your drawing using India ink that has been diluted with water. When the India Ink drawing is thoroughly dry, paint over it with white water-colour or gouache (such as zinc-white). (The writer may attempt the same thing with traditional gesso—marble dust, rabbit-skin glue, and white pigment—but this is not the traditional Mughal technique). The India Ink drawing will show through the white paint just enough to serve as a guide. We hope to show soon an example of a painting in progress with more information on technique.